Or use the written guide
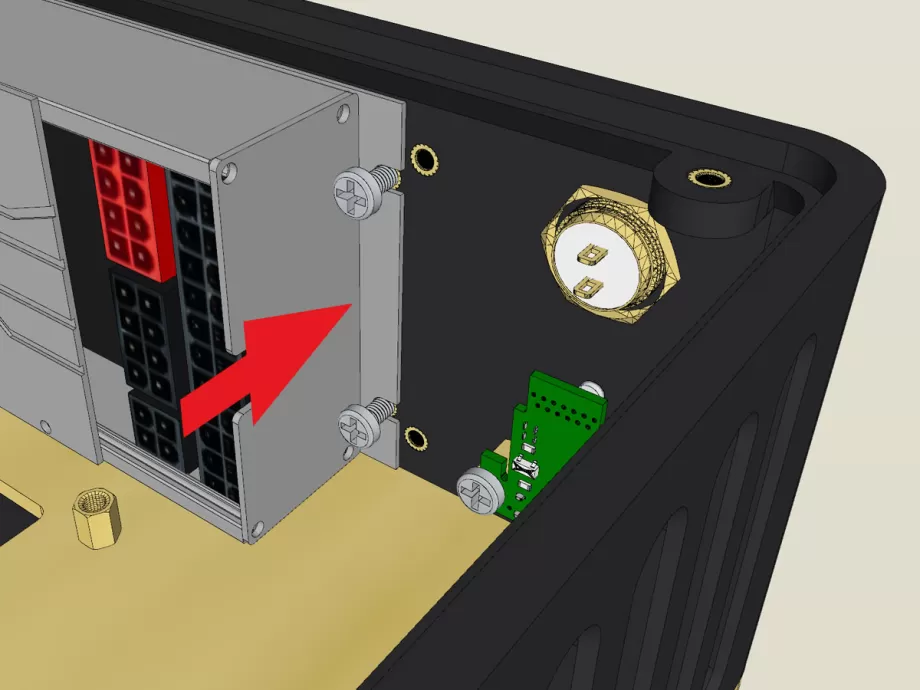
1.The AC input
Note: in case you ordered the Noctua fans, they come pre-installed and will have to be taken out first to install the leaf clover. You can do so with the included phillips screwdriver. When the AC inlet is installed, you can mount the fans again.
We're using the C6 (leaf clover) AC cable for the HDPlex. The threads of the leaf clover should be on the outside of the case. Fasten the leaf clover to the case using the M2.5x10mm screws.
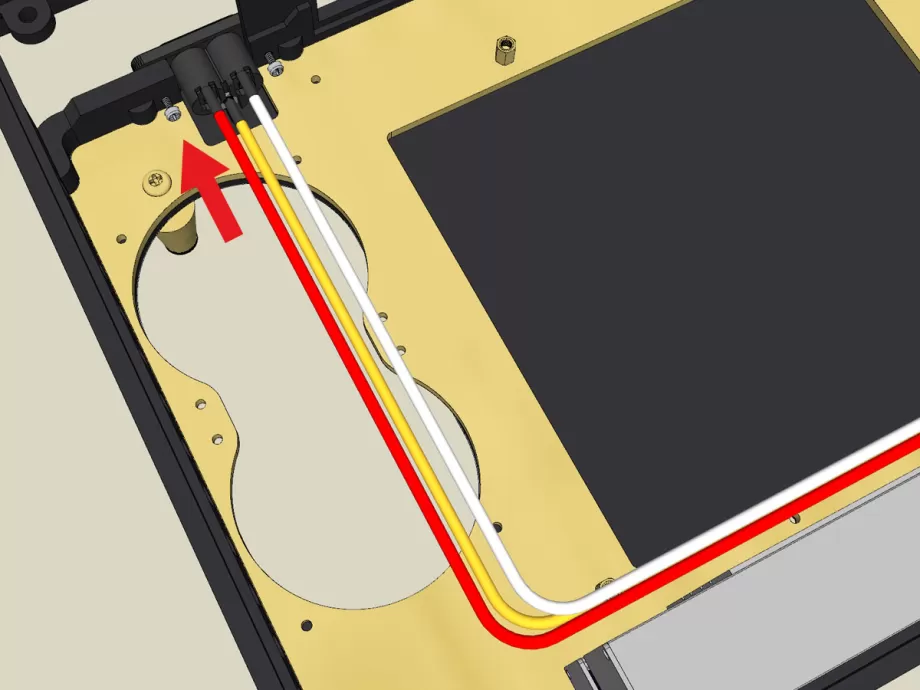
2.The power supply
The HDPlex power supply goes in first. Make sure the ATX connectors are on the side of the button. Route the AC cable against the power supply casing to the GPU side and then make a 90 degree bend. The additional white connector can be tucked away beneath the power button.
Newer revisions of the case mount the HDPlex without screws but with friction fit.
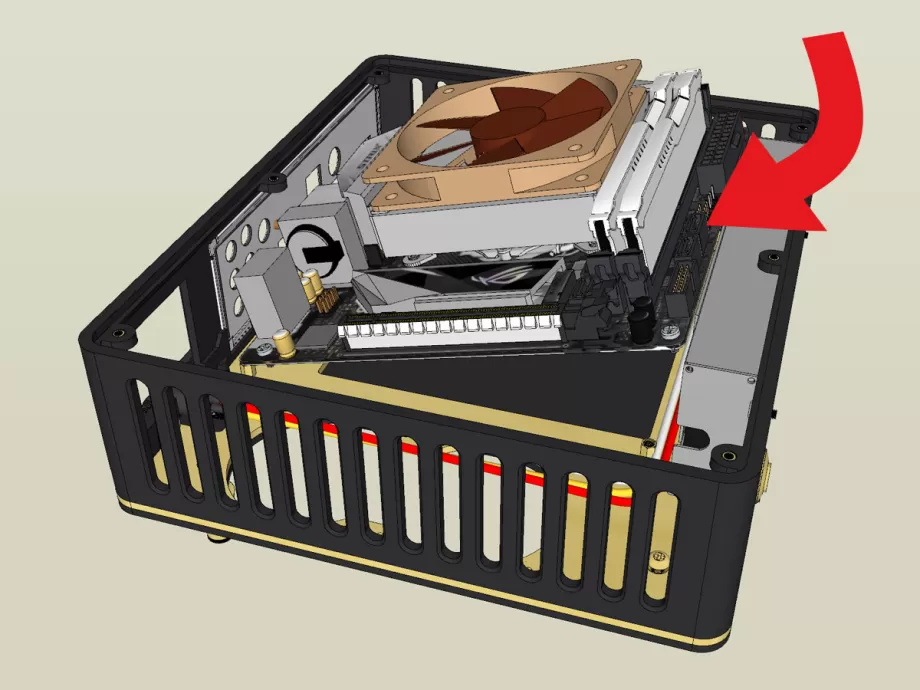
3.The motherboard
The motherboard should be fitted with CPU cooler, M.2 SSD and memory first, before inserting it into the case. Insert the motherboard i/o shield first in the provided cutout. Insert the motherboard at a slight angle before mounting it to the four threaded standoffs on the brass baseplate. Fasten the motherboard with the M3x6mm screws (non countersunk).
When the motherboard is wiggled into place, Yocto+ user wishing to install a 2.5" drive should insert the SATA cable into the HDPlex now.
Next, attach the 8 pin EPS cable to the HDPlex and then into the motherboard. The power button, power LED and USB cable are next. When everything else is connected, insert the 24 pin ATX cable.
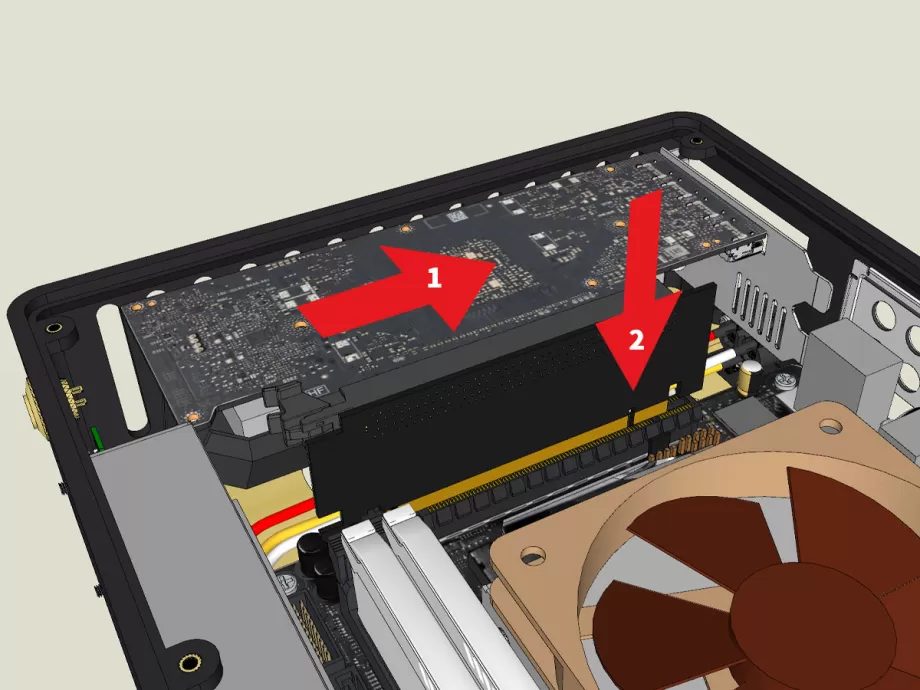
5.The graphics card
If you plan on deshrouding your GPU, the fan(s) should go in first. There are mounting points for up to two 60 mm fans. The AC cables should be routed between the fans and the motherboard.
Attach the riser board to your GPU first. Insert them together by moving them in from the front of the case and then pushing them down. Make sure the retention clips hold the card into place.
If it's too hard getting the card in, you can remove the PCIe bracket. The riser board supports the card well enough without it. Some motherboard with large integrated I/O shields also require this.
Yocto+ users can attach the 2.5 inch drive at this point. Use the 2 mounting holes on the bezel and the 2 mounting points on the printed part attached to the riser.

6.Close the case
The case can now be closed. The top panel has 6 brass screws that attach to the bezel.
You did it, you built into the Yocto, yay! Only thing left now is attaching the cables and taking her for a drive.
Do you want a Yocto?
Enjoy a handcrafted and stylish home theater or console that you don't have to hide from sight!