Preparations
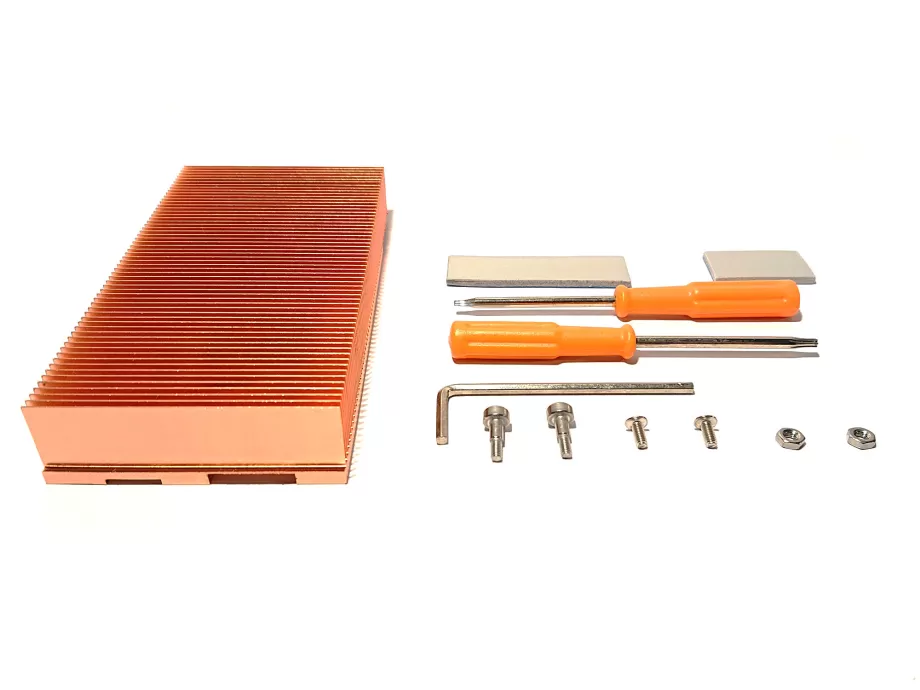
You should've received the heatsink along with some accessories. Make sure the box contains the following:
- Heatsink
- Thermal pads for the memory
- M2.5 shoulder screws to attach the heatsink to the PCB (left in the picture)
- M2.5 screws + bolts to attach the PCI bracket to the PCB (right in the picture)
- T6 and T8 screwdriver
- Hex key
You will need to provide for yourself:
- Phillips screwdriver (PH0 or PH1 preferred)
- Thermal paste of your choice
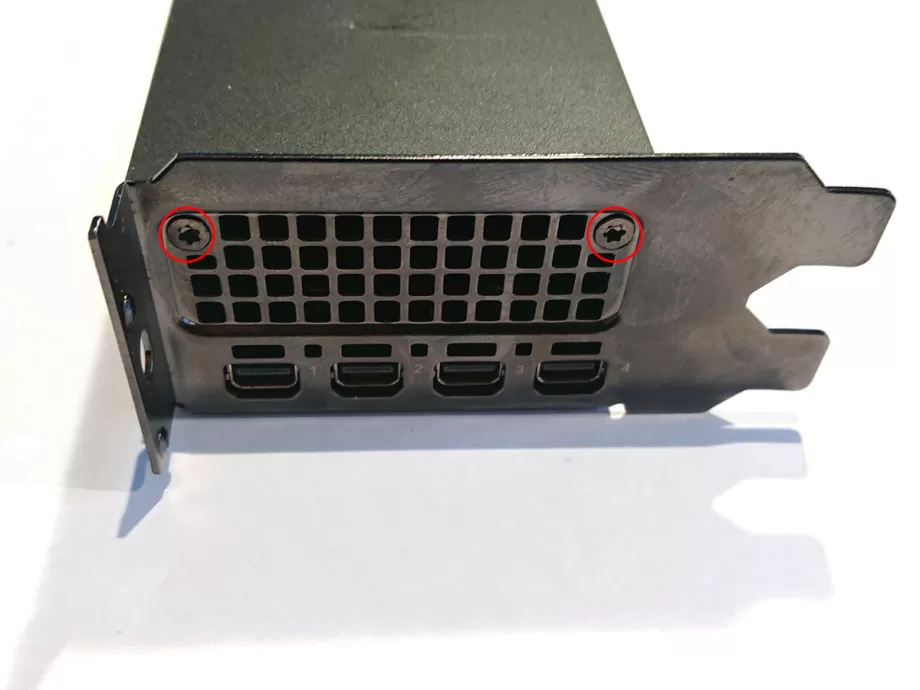
1.Remove the PCI bracket screws
The first screws to remove are the two screws that hold the PCI bracket to the shroud. They are both T8 screws, which is the largest screwdriver of the two included.
Don't pull off the PCI bracket just yet, as it's still fixed to the PCB.
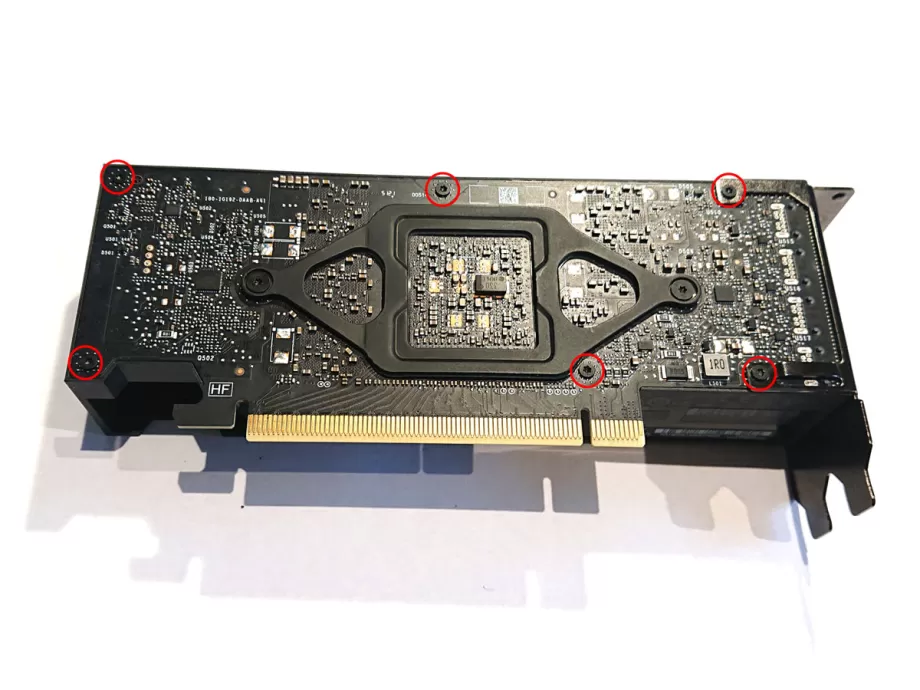
2.Remove the shroud
To remove the shroud, we need to unscrew all screws apart from the ones in the backplate (the retention bracket). They are all T6 screws.
Unscrew the right two screws first, as they are the ones still keeping the PCI bracket in place. You can take off the bracket and then unscrew the rest of the screws.
Lift the shroud a little bit and carefully detach the fan header. This may require small pliers. When the header is detached, you can take off the shroud.
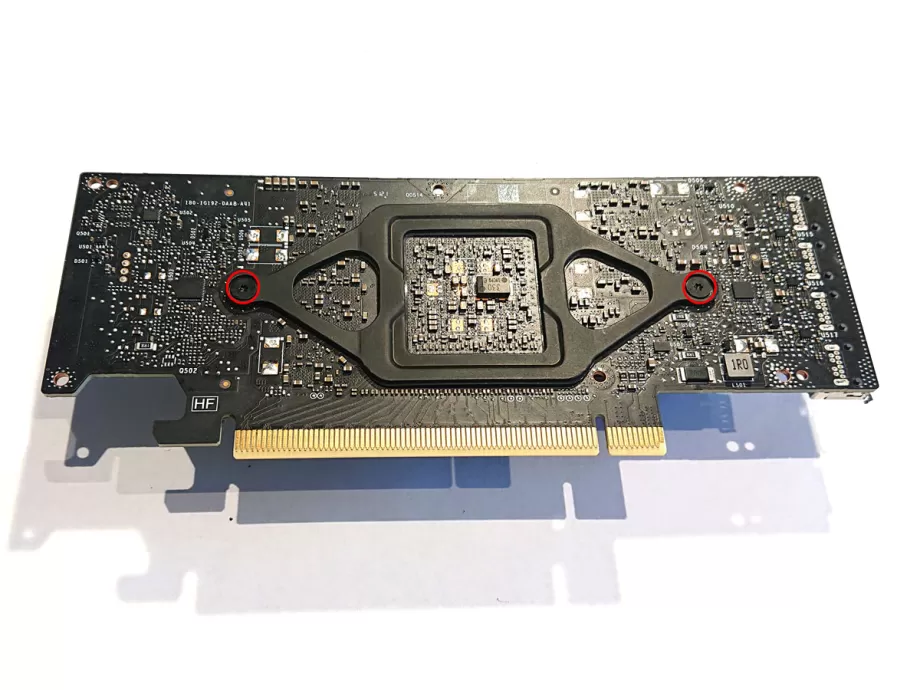
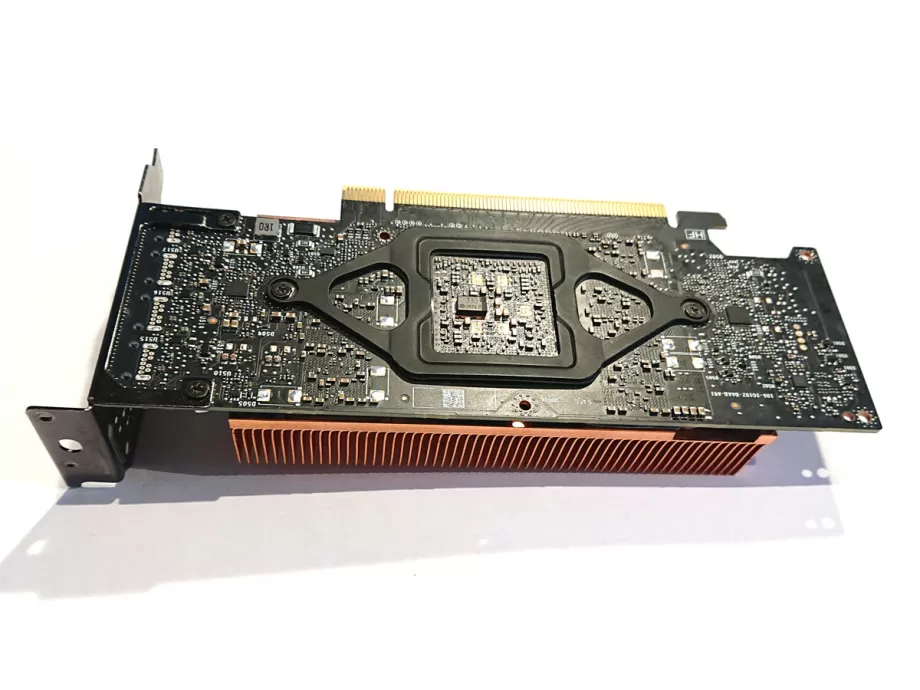
3.Remove the stock heatsink
The heatsink is attached with two T6 screws in the backplate. When unscrewing those, be wary that there is quite some force on the backplate, and it springs back when it comes loose. You may want to hold it when unscrewing the first screw in order not to damage things. When the second screw is loose, you can take off the heatsink. It may be glued to the die due to the thermal paste, carefully tilt it to the left and right until it comes loose in that case.
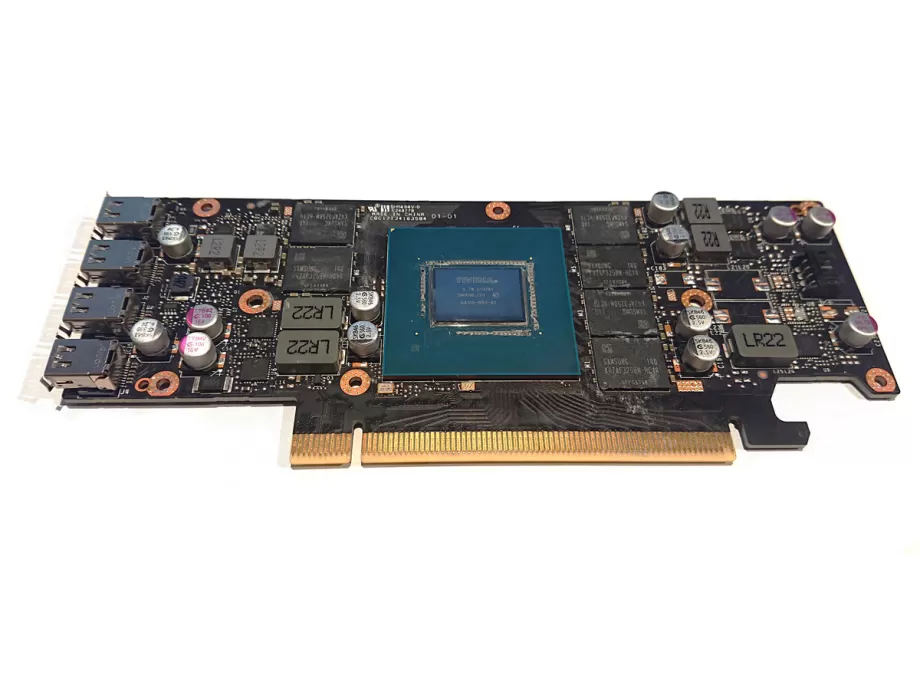
4.Clean the die and memory
Wipe the original thermal paste off the die using a lint free cloth. Clean the die using a bit of Isopropyl or other cleaning alcohol.
The original thermal pads are bad and should be replaced. They are brittle and probably come off in multiple pieces. You can use some Isopropyl here too.
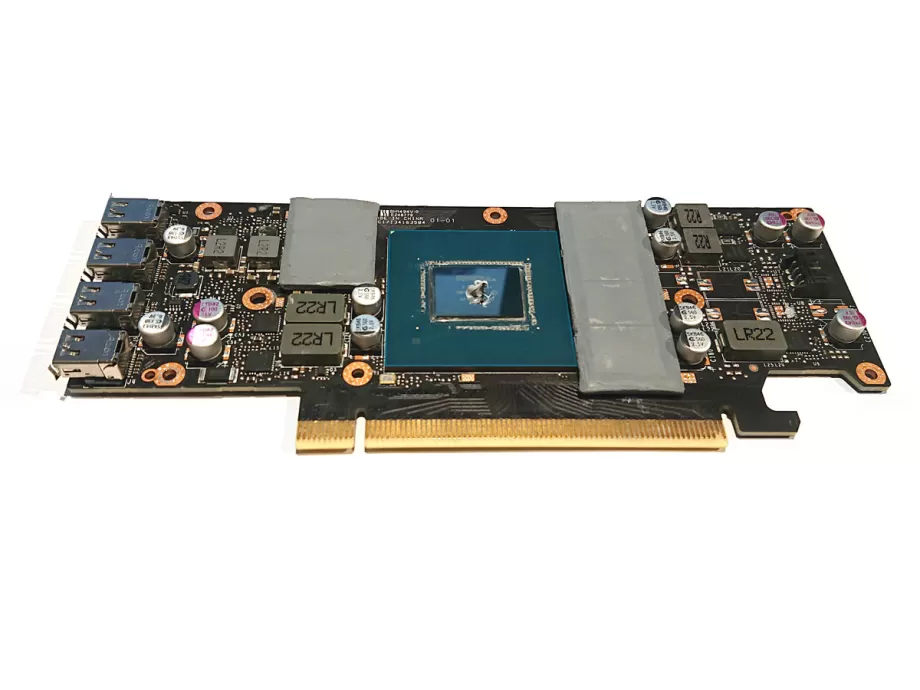
5.Thermal pads and paste
Put a small drop of thermal paste on the die and put the thermal pads on the memory chips. The pads are already cut to size, but don't forget to take the plastic off both sides.

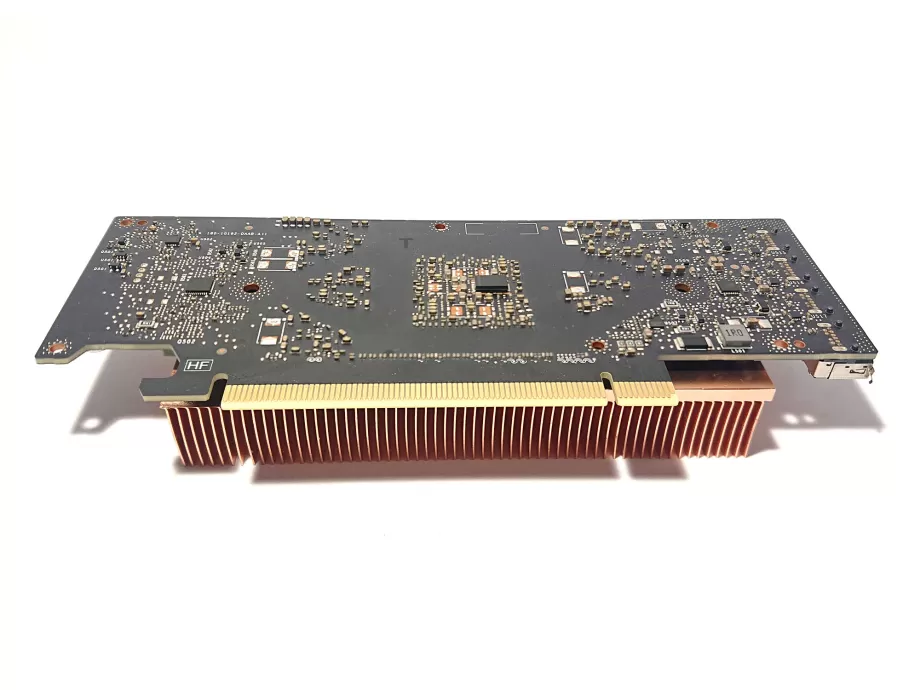

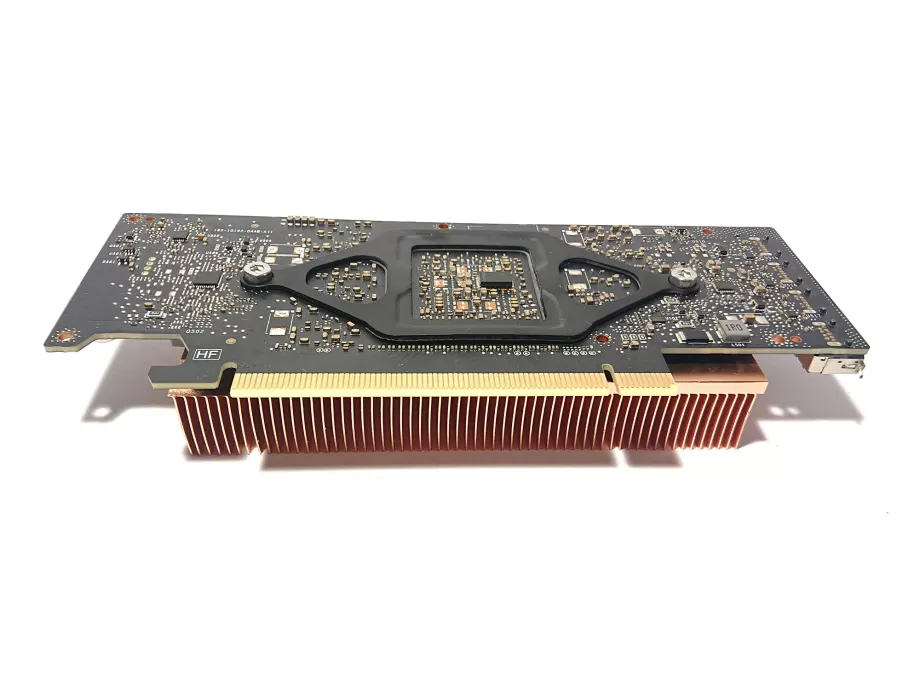
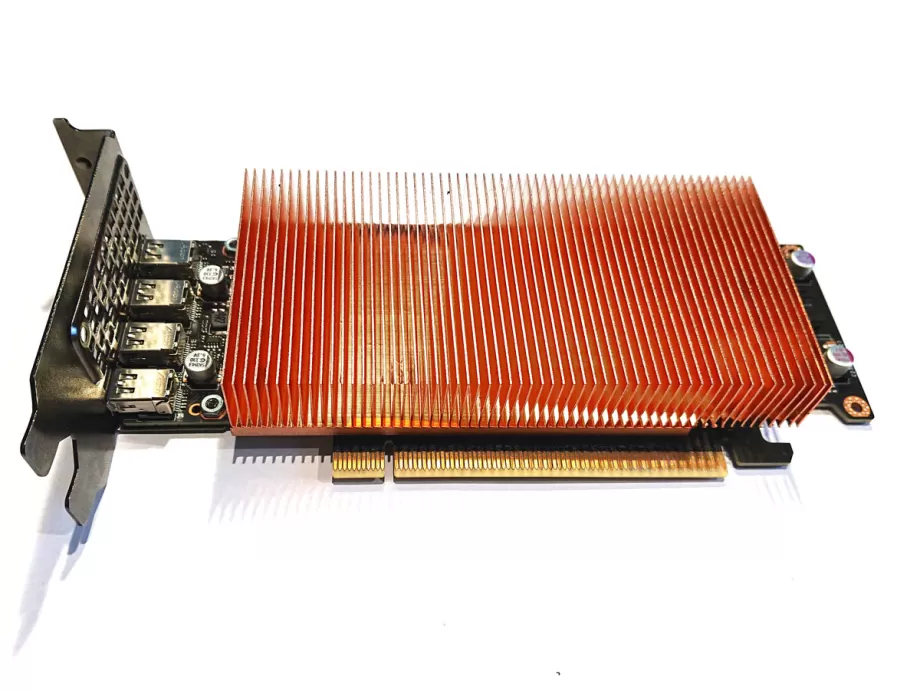
6.Attach the new heatsink
Lay the heatsink upside down and put the PCB on it, also upside down. Compare the caps and chokes on the PCB with the cutouts on the heatsink base, so you don't put it reverse (it would be impossible to mount anyway).
Put the backplate into place and screw the first shoulder screw through the backplate and PCB into the heatsink. Insert the second screw into the backplate and squeeze the backplate and heatsink together until you can screw it in. It requires quite some force to do so, be careful not to put force in the PCB or you may bend it.
When both screws are into place, tighten until you can't tighten them anymore. The 'shoulders' on the screws prevent you from screwing them in too far.
7.Attach the PCI bracket
The PCI bracket initially mounted to the shroud, but the shroud is gone now. I've provided two M2.5 screws and bolts to attach the PCI bracket using the original mounting holes.
Congratulations!
You are now ready to enjoy an inaudible RTX A2000 inside your Yocto! Just add two 60 mm fans and control them based on your GPU temperature using Fan Control. Read all about it in the GPU deshrouding guide.
Do you want an inaudible RTX A2000 too?
Purchase the custom RTX A2000 heatsink and follow this guide to enjoy the silence!